Best DIY Bridal Party Gift
These DIY bridal party gift bottle tags make the perfect addition to any gift for a bridal party member or shower attendee. They are fully customizable to your chosen colors and really easy to do. You can make them with just scissors or get fancy and use a Cricut if you have one. You can scale them up and put them on full size bottles of your favorite liquor or time them onto any gift. They add a personalized, hand made touch that anyone receiving them will love no matter the occasion.
We are going to show you how to do it on a Cricut but will also walk you through ways to make these if you do not have one.
1. Gather your supplies

You are going to need 2 different colors of paper (I used 3 here), a hole punch, a glue stick or roll on craft adhesive and some sort of string or ribbon. If you are not using a Cricut you will also need scissors and/or an X-Acto knife of some sort and a pencil. When it comes to selecting paper, your color options are endless but you need to pick paper that is thick like card stock so that your tag will hold up well and look good. The roll on adhesive is easier to work with but a glue stick will hold up better with thicker paper.
2. Design your tags

The easiest way to design these in Cricut is to make a rectangle that is 3 in wide by 2 in tall and a hexagon that is 2.5 in wide by 2 in tall. Then drag the hexagon over to the rectangle to match the picture above. Select the two shapes with your mouse and click ‘combine’ then ‘unite’ to merge the shapes into one to make the tag.
Then add a text box and change it to the name you want. Change the font to your desired one and drag the box into one of the tags. Adjust the size so that it looks good in the tag. Then select that tag with the letters and hit ‘attach’ to merge them so that they will cut together.
Another way is to draw out the shape that you want your tags to be with a pencil. Draw out two tags and draw in the letters on one of them.
3. Cut out your tags
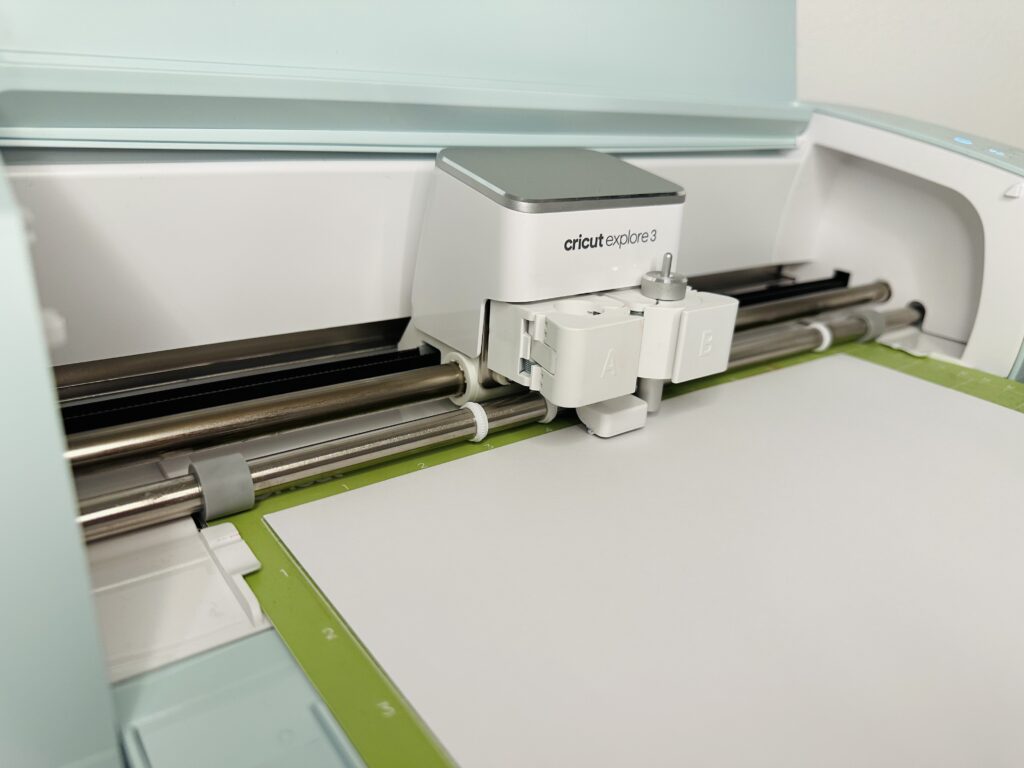
In Cricut, load your paper onto your mat and load into your machine as your Cricut directs you to. Then use your Cricut or a pair of scissors to cut out the small rectangle to go behind the letters.
Without a Cricut, use your scissors to cut out the tags and the X-Acto knife to cut out the letters. Make sure the surface that you are cutting on is protected so that you don’t hurt it. Then cut a small rectangle that covers the letters out of your second color of paper to go in between the two tag sections.
4. Assembly
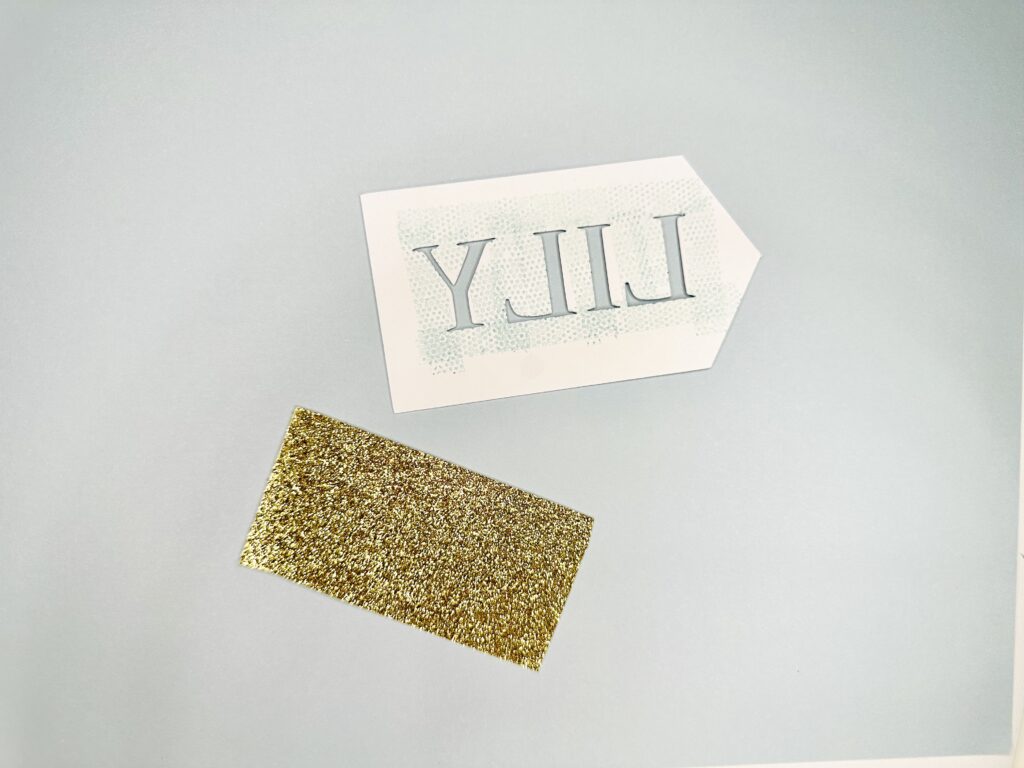
At this point you should have two tags cut out, one with the letters cut out and one without, the small rectangle from the second set of paper and whatever string or ribbon you want to use to tie the tag onto the bottle.
First flip the tag with the letters upside down and rub some glue on the back of it. Make sure you slip the tag with the letters so that it is face down because if not your name will end up backwards. Then press the small rectangle face down to stick to the tag with the letters. Once that is secured, add more glue to the tag with the letters and now the small rectangle then secure the tag without the letters to it.
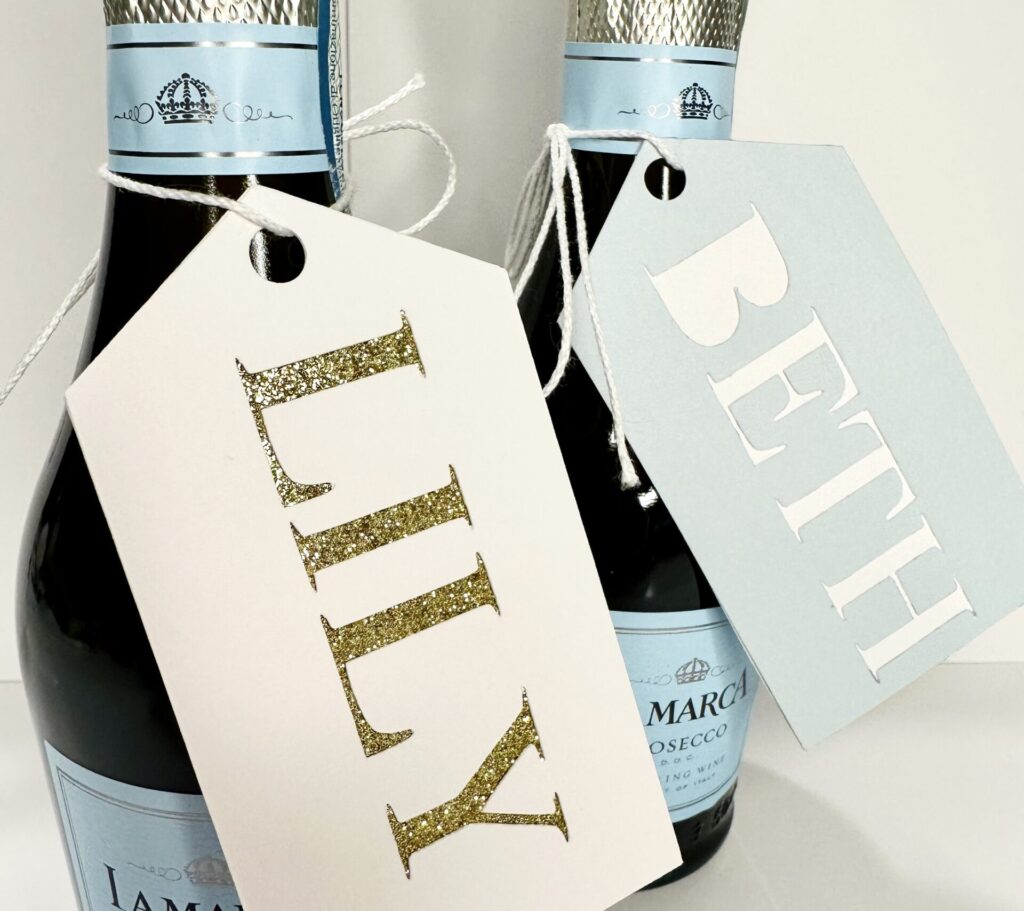
Give the glue a second to dry then punch a hole on the tapered end of the tag to run your string or ribbon through. Once that is done, all you have left is to tie to whatever bottle you have chosen!
Now you have beautiful, hand made tags for any occasion that you made yourself! Whoever receives these tags will love them!
Contact us if you have any questions!
If you do not have the time to make tags yourself or you are just looking for someone else to make them for you, we can help! Contact us to see about placing an order for these tags through us and we will work with you to make sure they are perfect for whatever the occasion! We can fully customize them to your colors at a competitive rate and are made by people who care.
Subscribe to our emails and be the first to know what is new.
1 Comment
Naomi Moench · March 7, 2023 at 9:24 pm
neat idea, could use for Easter or Christmas, Birthdays as well
Comments are closed.